
Blog
How to build a custom mechanical keyboard: A Beginner’s Guide
This tutorial is designed for beginners new to the mechanical keyboard hobby to simplify the custom mechanical keyboard building process. It is not a tutorial for advanced hobbyists that want to assemble a mechanical keyboard from scratch using the circuit board, casing and wiring (we’ll make another tutorial for that in due course). Instead, I will be showing you a simpler way for building a mechanical keyboard that will make it a fun experience while allowing you to do some level of customization with the switches and keycaps.
Now for a complete beginner, I always recommend getting a hotswap barebones keyboard (see below). A barebones keyboard is a keyboard that does not include the switches and keycaps, but has everything else such as the printed circuit board (PCB), plate and casing pre-assembled. This will save you alot of time and headache assembling everything on your own, and is especially recommended for beginners who are not comfortable wiring the PCB and testing the circuitry to ensure that each key is working. Most barebones keyboard comes with wireless Bluetooth capabilities, so all you have to do is to install the switches and then the keycaps.
When choosing a barebones keyboard, you’ll need to figure out whether you want a full-size keyboard with a numpad, a compact tenkeyless (TKL), or something even smaller like a 65% or 60% layout for a minimalist setup. Once you have the layout figured out, it’s time to pick the switches. Linear switches give you a smooth and quiet feel, tactile switches provide a nice little bump for feedback, and clicky switches offer that satisfying clicky sound. The keycaps are just as important, influencing both the feel and aesthetics. PBT keycaps are durable and textured, while ABS ones are smoother and lighter. Plus, keycap profiles like OEM, Cherry, or SA can change the typing experience quite a bit.
For those who are new here, my name is Timothy and I’m the founder of Kawaiikeys, a hobby site for keyboard enthusiasts. I created this site for those who enjoy customizing their keyboard and love to swap keycaps around with very stunning designs. Keycaps are a world on its own, and I’ll go through the different keycap profiles in this tutorial.
1. Start with a pre-built hotswap barebones keyboard

Keyboards come in various sizes, each catering to different needs and preferences:
- Full-Size (100%): Includes all keys, including the number pad, function keys, and navigation cluster.
- Tenkeyless (TKL, 80%): Omits the number pad, retaining function keys and navigation keys, resulting in a more compact form.
- 75%: Further condenses the TKL layout by minimizing space between keys, maintaining function and navigation keys in a tighter arrangement.
- 65%: Removes the function row and some navigation keys but retains arrow keys, striking a balance between compactness and functionality.
- 60%: Eliminates the function row, navigation cluster, and arrow keys, offering a minimalist and compact design.
- 40%: Retains only the alphanumeric keys, requiring extensive use of function layers for other inputs.
I personally prefer to get full size (100%) keyboards that have 104 keys – this means that you get all the controls including the numpad, which makes it the most versatile setup including for gaming use. That said, if you frequently use arrow keys and function keys, a 65% or 75% layout might be ideal. For a more minimalist setup, a 60% or 40% could be suitable.
A hotswap barebones keyboard allows you to customize the switches and change the switches to anything that you like (e.g., linear, tactile or clicky). The big advantage of starting out with a barebones keyboard is that the PCB, plates and casing are already assembled for you, so you can get straight to the fun part.
2. The fun part…selecting keyboard switches!

Switches are the heart of a mechanical keyboard, determining the feel and sound of each keypress. They are broadly categorized into:
- Linear: Provide a smooth keystroke without tactile feedback or audible click. Examples include Cherry MX Red and Gateron Red.
- Tactile: Offer a noticeable bump at the actuation point, providing feedback without an audible click. Examples are Cherry MX Brown and Zealios V2.
- Clicky: Feature both a tactile bump and an audible click at the actuation point. Examples include Cherry MX Blue and Kailh BOX White.
When selecting switches, consider factors such as actuation force, travel distance, and sound profile. It’s advisable to try out different switches using a switch tester to determine which type suits your typing style and preference.
Here are five of the most popular keyboard switches:
- Cherry MX Red: A linear switch known for its smooth keystroke and relatively light actuation force, making it a favorite among gamers who prefer rapid key presses without tactile feedback.
- Cherry MX Brown: A tactile switch that provides a noticeable bump at the actuation point, offering feedback without the audible click. It’s versatile and well-suited for both typing and gaming.
- Cherry MX Blue: A clicky switch that delivers both tactile feedback and an audible click at the actuation point, preferred by typists who enjoy a pronounced response with each keystroke.
- Gateron Red: Similar to Cherry MX Reds, these linear switches are praised for their smoothness and slightly lighter actuation force, providing a fluid typing experience.
- Kailh Box White: A clicky switch featuring a click bar design, offering a crisp click sound and tactile feedback, popular among those who appreciate a distinct auditory response.
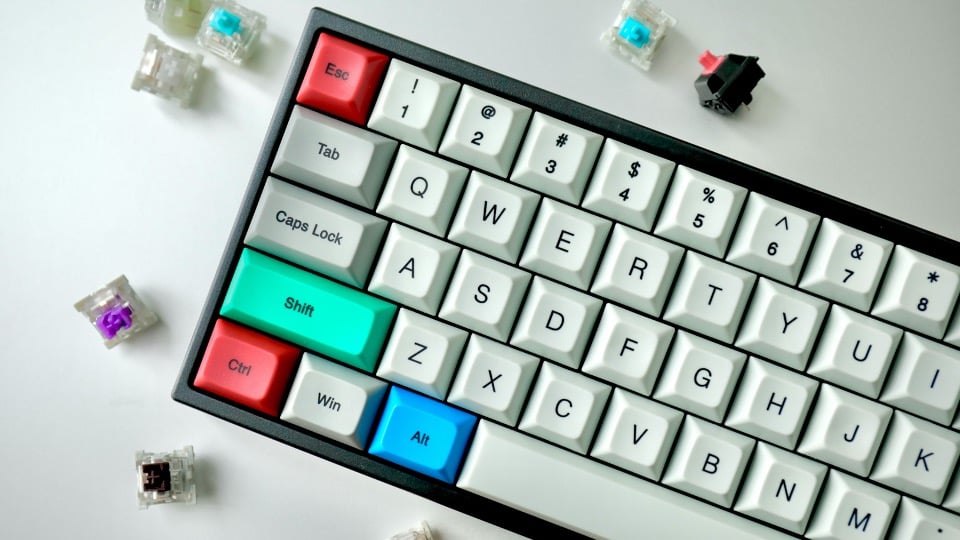
These switches represent a range of preferences, from linear to tactile to clicky, catering to different typing and gaming styles. I highly recommend getting MX style or “+” stem switches as most keycaps (see image above) as most keycaps will be compatible with + stem switches which is now the industry standard. If you get switches that have different stems, this will highly affect the ability to customize your keycaps and the design of the keyboard down the line.
For Hot-Swappable PCB barebones keybaords, all you have to do is align each switch with the corresponding slot in the switch plate and PCB. Press the switches firmly until they snap into place…and you’re done! This is why I highly recommend barebones keyboards for beginners as you don’t have to do any soldering and all you have to do is press the switches down to click them into place.
3. Final step…assembling the keycaps!

Keycaps significantly influence both the aesthetics and feel of your keyboard. Personally this is the part where I enjoy the most because you can watch the design of your keyboard come together once the keycaps are fitted in. The keycaps reflect your own personal style and design preference when building your own mechanical keyboard, and is the part where I enjoy customizing the most.
You can find many cute keycap designs for customizing your keyboard in our store here.
It should be noted that most keycaps are compatible with MX style or “+” stem switches which is now considered the market industry standard.
Some considerations when buying keycaps include:
- Material:
- ABS (Acrylonitrile Butadiene Styrene): Lightweight and smooth but prone to shine over time.
- PBT (Polybutylene Terephthalate): More durable with a textured feel, resistant to wear and shine.
Most keycaps on the market are made from PBT because they are more durable and resistant to wear and tear. They don’t accumulate human oils like ABS which may wear out after prolonged use.

- Profile:
- OEM: Standard profile found on many keyboards, with a sculpted shape.
- Cherry: Slightly shorter than OEM with a similar sculpted design.
- SA: Tall and spherical, offering a retro aesthetic.
- DSA: Uniform and low-profile with a flat surface.
- MAO: Slightly curved keycaps with a pointy ear-like keycap – see our store catalogue here
- MOG: A unique mushroom-style keycap design – see our store catalogue here
- XDA: A short uniform profile with a slightly cylindrical shape
- Legends:
- Double-Shot: Involves molding two layers of plastic, resulting in durable and long-lasting legends.
- Dye-Sublimated: Uses heat to infuse dye into the plastic, producing high-quality and durable legends.
Choose keycaps that complement your keyboard’s layout and reflect your personal style. Ensure that the keycap set you select is compatible with your keyboard’s layout, especially if you have a non-standard configuration.
Once you have assembled the keyboard, all you have to do is to connect the keyboard to your computer and use key testing software to confirm that all keys function as intended.
That’s it! Hope you enjoyed this tutorial!
If you have any further questions, reach out to us at hello@kawaiikeys.com and we’ll be happy to help!


